README.md
# TwitterLike
[](http://travis-ci.org/jpcercal/twitter-like)
[](https://codeclimate.com/github/jpcercal/twitter-like)
[](https://coveralls.io/github/jpcercal/twitter-like?branch=master)
[](https://packagist.org/packages/cekurte/twitter-like)
[](https://packagist.org/packages/cekurte/twitter-like)
[](https://insight.sensiolabs.com/projects/852284b4-4b00-4a49-b952-3d62b954ef4a)
- Just another simple web application that can be used to test the integration between the AngularJS and Silex PHP micro framework. So, this project is a cool and simplest version of Twitter micro blogging with a web responsible interface (thanks TwitterBootstrap) and with a REST API provided by Silex (thanks SensioLabs), **contribute with this project**!
## Installation
- The package is available on [Packagist](http://packagist.org/packages/cekurte/twitter-like).
- The source files is [PSR-2](https://github.com/php-fig/fig-standards/blob/master/accepted/PSR-2-coding-style-guide.md) compatible.
- Autoloading is [PSR-4](https://github.com/php-fig/fig-standards/blob/master/accepted/PSR-4-autoloader.md) compatible.
```shell
git clone https://github.com/jpcercal/twitter-like.git
cd twitter-like/
composer install
bower install
npm install
mkdir -p storage/cache
chmod +x app/console
chmod -Rf 777 storage/
cp .env.example .env
# change your database credentials
nano .env
grunt
# run "grunt production" to minify and optimize the web files
```
Now, you must create a MySQL database named `twitter_like` (this name can be changed in your `.env` file). After, you must type the command on your terminal:
```shell
php app/console orm:schema-tool:create
```
This command will create the entities on your MySQL database.
### Running a Web Server
After the steps that you followed to install this application, you must run a web server. So, type the following command on your terminal to create a web server.
```sh
$ php -S 0.0.0.0:8080 -t public/ public/index.php
```
Note that this command must be executed on root directory of this web application.
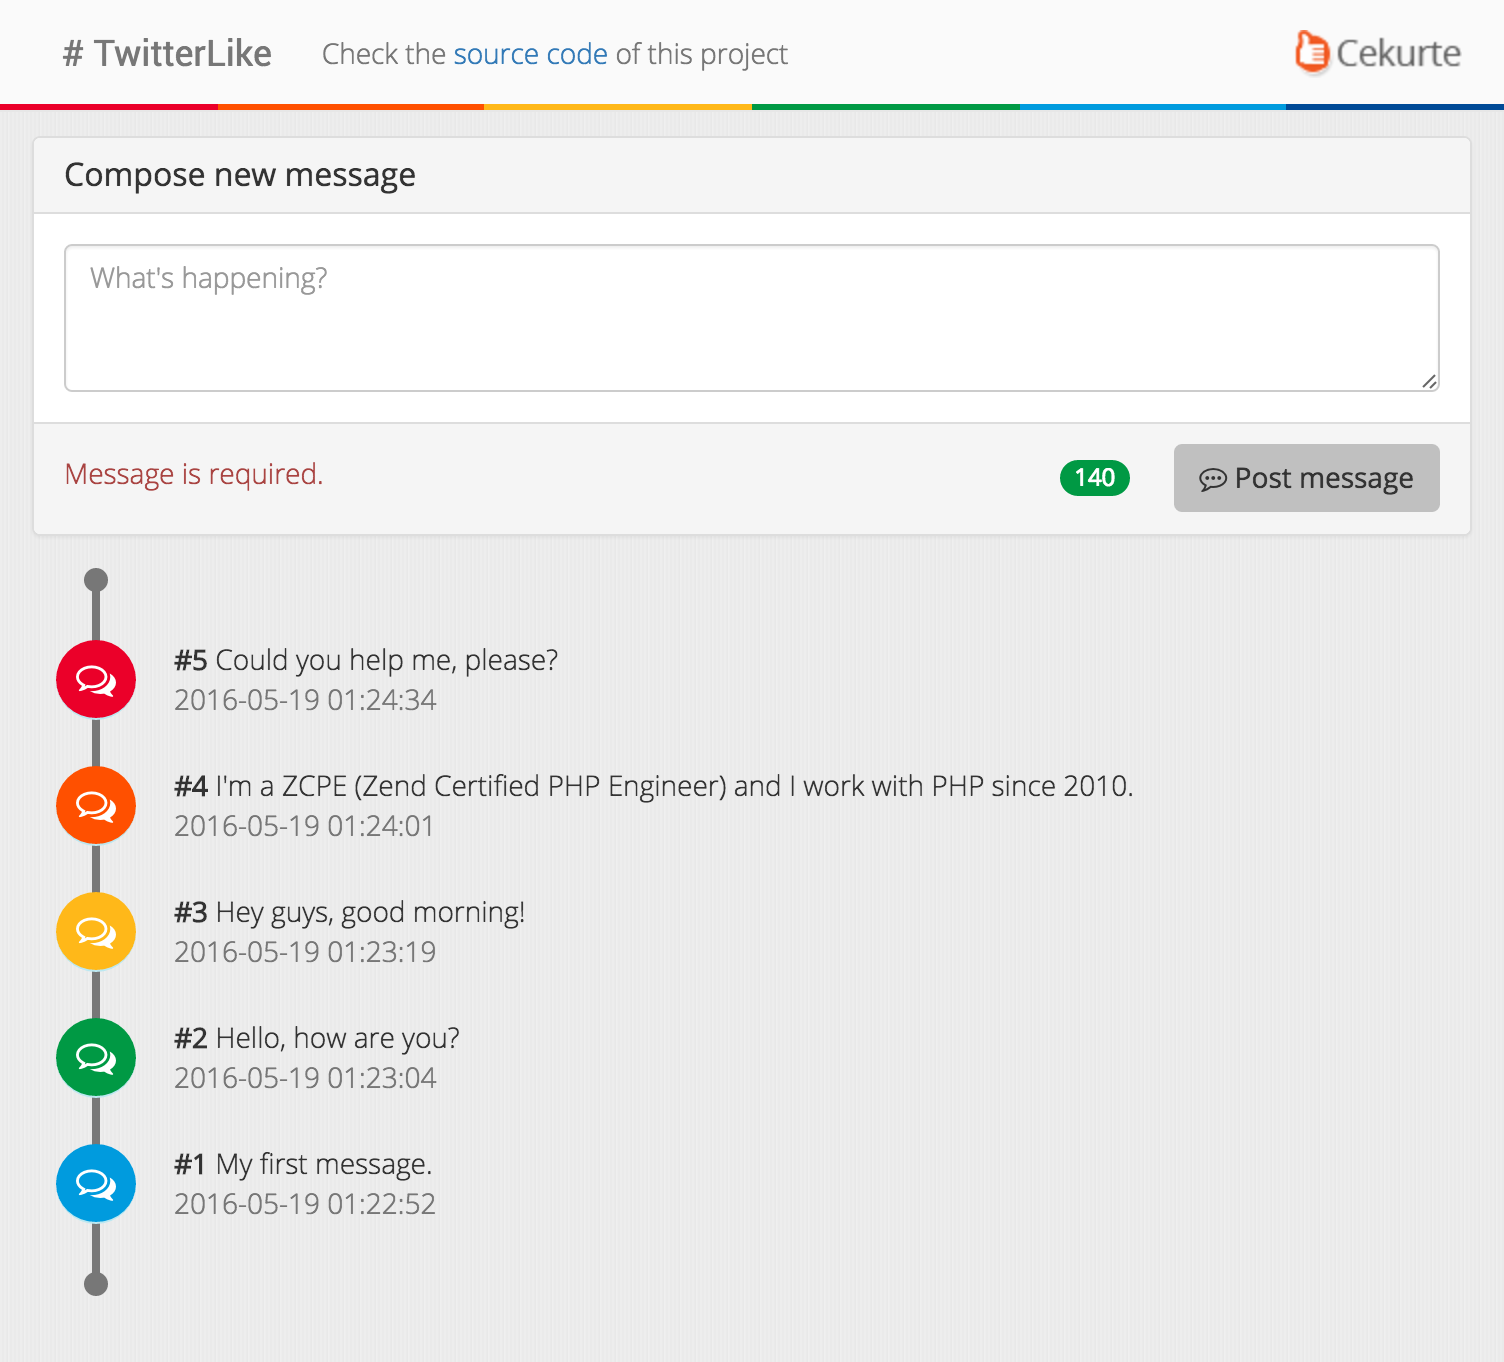
Now you can open your browser and access the application [http://localhost:8080/](http://localhost:8080/) that looks like with the following screenshot:
## API Documentation
Well, you can see below the HTTP routes where this application will handle your requests.
**GET** */* will load the web application.
**GET** */api/post* will load the posts from database in two format and return the results in two different formats (`json` or `xml`).
```json
[
{
"id":5,
"created_at":"2016-05-19 01:24:34",
"message":"Could you help me, please?"
},
{
"id":4,
"created_at":"2016-05-19 01:24:01",
"message":"I'm a ZCPE (Zend Certified PHP Engineer) and I work with PHP since 2010."
},
{
"id":3,
"created_at":"2016-05-19 01:23:19",
"message":"Hey guys, good morning!"
},
{
"id":2,
"created_at":"2016-05-19 01:23:04",
"message":"Hello, how are you?"
},
{
"id":1,
"created_at":"2016-05-19 01:22:52",
"message":"My first message."
}
]
```
Or in XML if you send a request with the `Accept` header with the value `text/xml`:
```xml
<?xml version="1.0" encoding="UTF-8"?>
<result>
<entry id="5" created_at="2016-05-19 01:24:34">
<![CDATA[Could you help me, please?]]>
</entry>
<entry id="4" created_at="2016-05-19 01:24:01">
<![CDATA[I'm a ZCPE (Zend Certified PHP Engineer) and I work with PHP since 2010.]]>
</entry>
<entry id="3" created_at="2016-05-19 01:23:19">
<![CDATA[Hey guys, good morning!]]>
</entry>
<entry id="2" created_at="2016-05-19 01:23:04">
<![CDATA[Hello, how are you?]]>
</entry>
<entry id="1" created_at="2016-05-19 01:22:52">
<![CDATA[My first message.]]>
</entry>
</result>
```
**POST** */api/post* will receive a content type as `application/json` with the following content:
```json
{
"message":"Could you help me, please?"
}
```
This request will create a resource on your entity Post and will return a response where the content type will be `application/json` with the following content:
```json
{
"id": 6,
"created_at": "2016-05-19 01:24:34",
"message": "Could you help me, please?"
}
```
**If you liked of this project, give me a *star =)*.**
Contributing
------------
1. Give me a star **=)**
1. Fork it
2. Create your feature branch (`git checkout -b my-new-feature`)
3. Make your changes
4. Run the tests, adding new ones for your own code if necessary (`vendor/bin/phpunit`)
5. Commit your changes (`git commit -am 'Added some feature'`)
6. Push to the branch (`git push origin my-new-feature`)
7. Create new Pull Request