README.md
This software is work in progress and has not been released yet! [](https://travis-ci.org/learnery/learnery) [](https://codeclimate.com/github/learnery/learnery)
README
========
Learnery is a rails engine you can use in your rails app to organize
open learning events, like railsbridge, barcamps, user groups,
meetups, hackathons. You can adapt it to your
liking and deploy the app to heroku in a few simple steps.
This README contains info on
* [Installation](#installation)
* a) [Clone an example app](#clone-an-example-app)
* b) [Build your own app from scratch](#build-your-own-app-from-scratch)
* [Deploying To Heroku](#deploying-to-heroku) for both a) and b)
* [Adapting the look and feel of your app](#adapting-the-look-and-feel-of-your-app)
* [Internationalization (I18n)](#internationalization-i18n)
* [Configuring OAuth Authorizations](#configuring-oauth-authorizations)
* [Continuous Deployment](#continuous-deployment)
* [DEVELOPING THE LEARNERY RAILS ENGINE](#developing-the-learnery-rails-engine)
Installation
======
Before you start, make sure you have rails 4.0.0 installed:
$ rails -v
Rails 4.0.0 # <--- higher numbers are also ok
Rails 3.2.13 # <--- first number smaller than 4 is not ok
To use learnery, you have to have a rails application. This application uses learnery as a rail engine.
There's two ways to do that:
a) Clone one of the example apps and work from there
b) Build your own app from scratch
a) Clone an example app
---------------------
Pick one of our four example app:
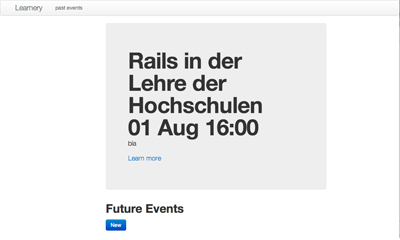
"Default"
* [Repository](https://github.com/learnery/learnery-default)
* [Demo](http://learnery-staging.herokuapp.com/)
* Screenshot:
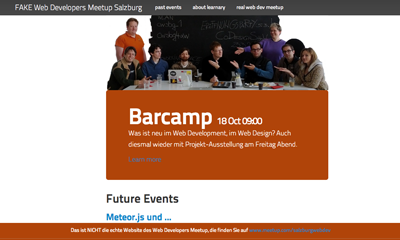
"Webdev"
* [Repository](https://github.com/learnery/learnery-webdev)
* [Demo](http://learnery-staging-webdev.herokuapp.com/)
* Screenshot:
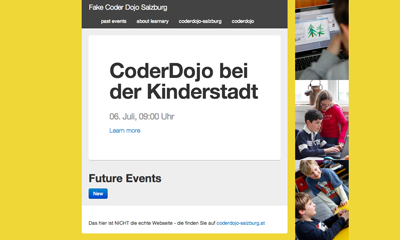
"CoderDojo"
* [Repository](https://github.com/learnery/learnery-coderdojo)
* [Demo](http://learnery-staging-coderdojo.herokuapp.com/)
* Screenshot:
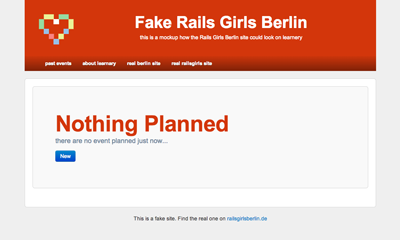
"RailsGirls"
* [Repository](https://github.com/learnery/learnery-railsgirls)
* [Demo](http://learnery-staging-railsgirls.herokuapp.com/)
* RailsGirls
If you have a github account:
* fork the example apps repository to your own github account
* clone your own repository to your development machine
If you do not have a github account:
* clone the example app directly
b) Build your own app from scratch
---------------------
create a new app:
$ rails new your-app-name
$ cd your-app-name
and use learnery from within it: add the learnery gem to your Gemfile (outside any "group")
# add this line to Gemfile within the rails application
gem 'learnery', :git => 'git://github.com/learnery/learnery.git', branch: 'stable'
run bundler:
$ bundle
generate the initial theme files
$ rails generate learnery:theme
If you have own files in your rails app and want to see what the generator does, you can run it in test mode first ("pretend")
$ rails generate learnery:theme -p
then, install the migrations for the learnery engine and run them:
$ rake learnery:install:migrations
$ rake db:migrate
mount the learnery engine in config/routes.rb: add this line somewhere between the
<YOURAPPNAME>::Application.routes.draw do
and the last end
mount Learnery::Engine => "/", as: "learnery"
to use pretty, bootstrap-styled errer messages in forms add
the following initializer. (You can create initializers by
creating a file in config/initializers with a new name and extension .rb
we recommend using config/initializers/bootstrap_field_error.rb)
# config/initializers/bootstrap_field_error.rb
# from http://stackoverflow.com/questions/7341545/rails-actionviewbase-field-error-proc-moving-up-the-dom-tree
# fix display of errors in form to go well with bootstrap
ActionView::Base.field_error_proc = Proc.new do |html_tag, object|
html = Nokogiri::HTML::DocumentFragment.parse(html_tag)
html = html.at_css("input") || html.at_css("textarea")
unless html.nil?
css_class = html['class'] || ""
html['class'] = css_class.split.push("error").join(' ')
html_tag = html.to_s + "<span class='help-inline'>" + object.error_message.join(". ") + "</span>"
end
html_tag.html_safe
end
finally, start the server locally:
$ rails server
Deploying To Heroku
------------
You can deploy to heroku: (if you don't have a heroku account yet, go to [https://get.heroku.com](https://get.heroku.com) and get one first)
heroku create
git push heroku master
heroku run rake db:migrate
heroku open
congratulations, your site is online!
### Adapting the look and feel of your app
Here are the most important files to edit:
app/
├── assets
│ ├── images
│ │ ├── * <-- add your images here
│ │ └── favicon.ico
│ └── stylesheets
│ ├── style.css.less <--- add custom css here
│ └── variables.css.less <--- 3) change the colors
└── views
├── layouts <--- ignore! do not write your own application-layout!
└── learnery
├── pages
│ ├── *.html.md <--- add "static" pages here
│ └── about.html.md
└── theme
├── _footer.html.erb
├── _site_description.html.erb <--- 2) add a short descriptive text about your events
├── _site_links.html.erb <---
└── _site_name.html.erb <--- 1) add your sites name
We recommend you start by
1. adding your sites name
2. adding a short descriptive text
3. changing the colors
For advanced users: If you want to change the layout of the whole page
you can do so by adding a file app/views/learnery/shared/_main_layout.html.erb
it's probably best to [copy it from one of the example apps](https://github.com/learnery/learnery-coderdojo/blob/master/app/views/learnery/shared/_main_layout.html.erb) and work from there.
### Internationalization (I18n)
The engine comes with german and english texts.
To switch to german edit your config/application.rb
# in file config/application.rb
config.i18n.default_locale = :de
To add a new language, say :fi, create a file
config/locales/learnery.fi.yml by copying the current
english or german version from github:
https://github.com/learnery/learnery/blob/master/config/locales/learnery.en.yml
https://github.com/learnery/learnery/blob/master/config/locales/learnery.de.yml
We accept pull requests for new languages!
### Configuring OAuth Authorizations
Learnery has oauth authorizations for twitter, github and steam.
To active them on your page, you have to register you app and
get oauth keys from the providers, then make them known
to your app via environment variables on the server.
If you don't want to use all oauth providers, configure them in
config/initializers/learnery.rb:
Rails.application.config.oauth_providers = [:github, :twitter, :steam]
#### Configuring Twitter Authorization
If you want to use Twitter Authorization, you need to register
your app / instance of learnery with twitter at https://dev.twitter.com/apps/new
Make sure to provide a callback URL in the settings section.
To test locally, set the environment variables before running rails server (pick up your keys from http://dev.twitter.com !)
export TWITTER_CONSUMER_KEY=xxx
export TWITTER_CONSUMER_SECRET=xxx
And finally make these keys known to heroku with
heroku config:set --app learnery-staging TWITTER_CONSUMER_KEY=xxx TWITTER_CONSUMER_SECRET=xxx
#### Github
* [Link to App Registration](https://github.com/settings/applications)
* Github keys:
* GITHUB_KEY
* GITHUB_SECRET
#### Steam
* [Link to App Registration Page](http://steamcommunity.com/dev/apikey)
* Steam Key:
* STEAM_WEB_API_KEY
### Continuous Deployment
The app contains a script that deploys to heroku automatically from travis ci:
ci/deploy.rb
Before you use trevis, run the first deploy to your heroku from your own, complete repo like this:
export HEROKU_API_KEY=xxxx
export TRAVIS_TEST_RESULT="0"
export LEARNERY_THEME=default
ci/copytheme.sh
bundle
bundle exec ci/deploy.rb <herokuappname>
This is necessary because travis ci truncates the git repository.
DEVELOPING THE LEARNERY RAILS ENGINE
==============
Backlog
---------------
on Github, with [issues](https://github.com/learnery/learnery/issues?state=open)
Heroku
--------------
[http://learnery.herokuapp.com](http://learnery.herokuapp.com)
Things we may want to cover:
-----------
* Ruby version
1.9.3 and 2.0.0 should both work
* System dependencies
see gemfile
* Configuration
* Database creation
* Database initialization
* How to run the test suite
rake
* Services (job queues, cache servers, search engines, etc.)
* Deployment instructions
git push heroku master